How to Choose the Right Spring Check Valve?
Choosing the right spring check valve requires more than matching pipe size. The valve must suit the fluid, pressure, temperature, and installation position. A small mismatch can create serious operating problems. For example, excessive spring force may restrict flow and increase pump energy use. Weak spring force may allow reverse flow after shutdown. That backflow can damage pumps, contaminate process lines, or produce sudden water hammer.
Practical selection begins with the system’s actual working conditions. Confirm the connection standard, body material, seal compatibility, and rated pressure. Stainless steel may serve corrosive environments better than standard brass. Elastomer seals also behave differently with hot water, oil, chemicals, and compressed air. Check the required cracking pressure carefully. A valve opening at 0.5 bar may be unsuitable for a low-pressure dosing line. Measure available flow, not only the pump’s nameplate rating. Real installations often include elbows, filters, and narrow tubing that change performance.
Installation details matter just as much. Follow the flow arrow. Keep the valve accessible for inspection. Vertical piping can affect how some designs close. A trusted manufacturer should provide flow curves, material data, test information, and clear maintenance guidance. These details support safer engineering decisions and easier troubleshooting. There is no perfect valve. Cost, service life, pressure loss, and maintenance needs must be balanced honestly. Even experienced technicians can overlook debris, vibration, or an unexpectedly dirty fluid. Careful checking remains worthwhile. A well-selected spring check valve should close reliably, protect downstream equipment, and perform consistently throughout the system’s operating life.
What Is a Spring Check Valve and How Does It Work?
How to Choose the Right Spring Check Valve?
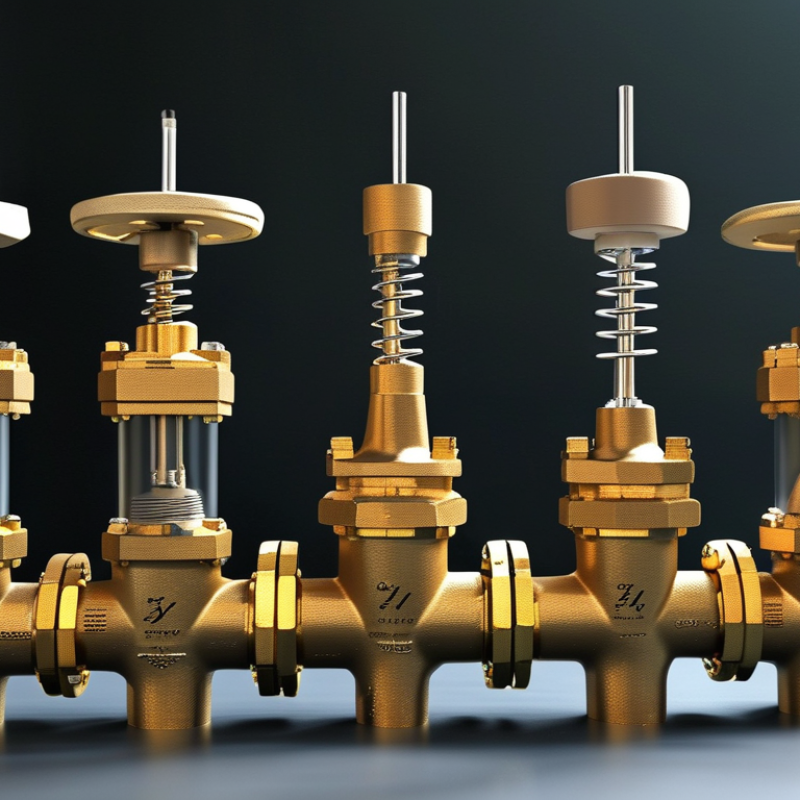
A spring check valve allows fluid to move in one direction and blocks reverse flow. Its main parts include a valve body, sealing element, and spring. When inlet pressure exceeds the spring force, the disc or poppet lifts from its seat. Flow begins. When pressure falls, the spring pushes the sealing element closed. That action helps protect pumps, piping, and sensitive equipment from backflow.
The key value is cracking pressure, which is the minimum pressure needed to open the valve. A weak spring may not stop reverse flow quickly. A strong spring can restrict flow and increase pressure loss. It must close.
During system checks, compare the valve’s flow direction with the arrow on its body. Then confirm the medium, operating pressure, temperature, pipe size, and installation position. Clean water, compressed air, oil, and corrosive fluids may require different sealing materials. A valve rated for the pipe diameter may still perform poorly if its flow capacity is too low.
Do not guess.
Listen for chatter, vibration, or repeated impact during operation. These signs can indicate unstable flow, incorrect sizing, or a damaged seat. A spring check valve may work in a test line but fail in a pump discharge line. That assumption can be wrong. Consider pressure surges and maintenance access before selection. A removable design can make inspection easier, although it may add cost and length. Measure twice.
How to Match Valve Materials with the Fluid and Operating Conditions
Choosing the right spring check valve starts with the fluid, not the pipe size. Water, brine, steam, oxygen, and hydrocarbons attack materials differently. Confirm concentration, temperature, pressure, velocity, and solids before selecting the body, spring, seat, and disc.
For clean water, stainless steel often offers practical corrosion resistance. Chloride-rich water may require duplex stainless steel or a more resistant alloy. Wet chlorine service is less forgiving. Avoid relying on a generic “stainless” label; grade and weld quality matter. The NACE IMPACT study estimated global corrosion costs at about $2.5 trillion annually, equal to 3.4% of global GDP. Small material decisions can create large maintenance bills.
Temperature changes the choice again. Steam needs a seat and spring that retain strength under repeated heating cycles. Elastomers can harden, swell, or crack when exposed to oils, solvents, or aggressive chemicals. For oxygen service, clean and compatible materials are essential, with ignition risks reviewed during engineering approval. The U.S. Department of Energy’s industrial efficiency guidance links leakage and poor control to avoidable energy losses, although it does not solve every valve problem. That limitation matters. A valve that survives corrosion may still fail from water hammer, spring fatigue, or an unsuitable cracking pressure. Check the fluid data sheet, pressure-cycle history, and relevant material compatibility tables before final selection.
How to Select the Correct Pressure, Temperature, and Flow Ratings
Choosing the Right Spring Check Valve
Selecting a spring check valve starts with its pressure rating. Do not match it only to the pipe size. Compare the valve’s maximum working pressure with the highest pressure your system can produce, including startup surges. Cracking pressure also matters. A valve that opens too easily may allow unwanted reverse flow. One that requires excessive pressure can restrict the process. I have seen small pressure differences create unstable operation, especially near pumps and dosing equipment.
Temperature ratings require equal care. Check both the process temperature and possible cleaning cycles. The body, spring, seat, and seal must tolerate the full temperature range. A seal may perform well during normal operation but fail after repeated heating. That detail is easy to overlook. Leave a safety margin instead of selecting the exact listed limit.
Tips:
Estimate the required flow rate, then review the valve’s flow coefficient and pressure-drop data. A valve with a suitable pressure rating may still reduce flow too much. Compare operating flow with the manufacturer’s tested range. Check installation direction, pipe position, and backpressure requirements. If the application contains particles or changing viscosity, ask for material compatibility data. I once focused too heavily on flow capacity and underestimated maintenance access. That choice worked on paper, but not in the field. Reliable selection combines datasheets, operating measurements, and a realistic review of future conditions.
How to Choose the Right Valve Size, Connection, and Installation Position
How to Choose the Right Spring Check Valve?
Valve sizing should start with flow data, not pipe diameter alone. Record the normal, minimum, and maximum flow rates, fluid temperature, pressure, and density. A valve that is too small may create excessive pressure loss and noise. An oversized valve may fail to open fully, causing unstable operation and premature wear. Hydraulic Institute guidance recommends checking velocity, pressure drop, and minimum operating flow before selection. The U.S. Department of Energy reports that optimized pumping systems can reduce energy use by 20–50%. A poorly sized check valve can waste part of that potential.
Connection type must match the piping system and maintenance plan. Threaded ends suit smaller lines and simple replacement. Flanged connections offer better alignment control on larger systems. Wafer designs save space, but nearby elbows may disturb the disc. Leave enough clearance for removal. Installation position matters, too. Many spring-loaded valves work in horizontal or vertical lines, but the arrow must follow the actual flow direction. Confirm the manufacturer’s pressure rating against ASME B16.5 or the applicable piping standard. I once focused only on the nominal diameter and overlooked reverse-flow surges. That decision needed rework. Review closing speed, cracking pressure, and water-hammer risk with real operating data, not assumptions.
How to Choose the Right Spring Check Valve?
Select the valve size according to the required flow rate and an acceptable fluid velocity.
The chart shows theoretical water-flow values calculated from nominal internal diameters at
1.5 m/s and 3.0 m/s. Actual capacity depends on the valve design, pressure drop, fluid properties,
and the manufacturer’s certified flow data.
Use a connection that matches the piping system, such as threaded, flanged, or socket-welded ends.
Install the valve in the direction of flow shown by the body arrow, preferably in an accessible
location. Spring check valves can generally be installed in horizontal or vertical pipelines,
but vertical installation should follow the manufacturer’s specified flow direction.
How to Compare Maintenance Needs, Service Life, and Total Cost
How to Choose the Right Spring Check Valve?
How to Compare Maintenance Needs, Service Life, and Total Cost
A spring check valve should match the fluid, pressure range, temperature, and installation position. A correct fit reduces leakage, vibration, and unexpected shutdowns. In field inspections, small valves often fail because debris prevents the disc from seating. The spring may remain usable, but the sealing surface becomes damaged. Choose a design that allows practical inspection and cleaning. Easy access matters.
Maintenance requirements vary with fluid cleanliness and operating frequency. A valve in clean water may need periodic checks, while one in a chemical or abrasive line needs closer attention. Inspect the spring, seat, disc, and body for corrosion or wear. Record pressure changes and unusual noise. These details reveal problems early. They also expose weak assumptions.
Service life depends on cycling, material compatibility, and installation quality. A stronger spring is not always better. Excessive cracking pressure can reduce flow and increase pump energy. A cheaper valve may require frequent replacement, labor, and production stops. That purchase price can mislead us. Compare acquisition cost, inspection time, replacement parts, energy use, and downtime over several years. Include disposal and inventory costs. Incomplete records can distort the calculation. A simple maintenance log, paired with the manufacturer’s technical data and applicable engineering standards, gives a more reliable comparison.





 © Copyright 2020 Tianjin Tanghaidongyang Valve Co., Ltd. All Rights Reserved.